layout: layouts/post.njk title: Automating Unity iOS build and upload to App Store Connect description: This article aims to gather all the information you need to automate the iOS build of your game and upload it to App Store Connect. date: 2025-03-24 lang: EN tags:
- Gamedev
- Unity3D
- C#
- Unity Cloud Build
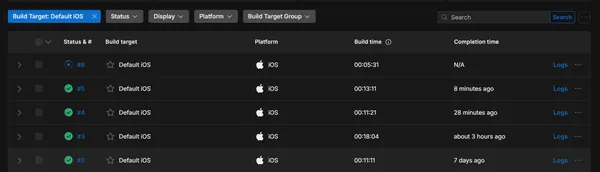
- iOS image: header.png legend: "Screenshot of successful builds in Unity DevOps Build Automation"
Creating and uploading iOS builds to App Store Connect can be a tedious process, especially when you don't have access to a Mac. This article will show you how to automate this process using Unity Cloud Build Automation.
Be aware that there is no free tier for Unity Cloud Build Automation for mac devices, so you'll need to enter some credit card information. You'll be charged for the build minutes you use, you can expect ~1€ per build for a small to medium project.
Prerequisites
Before we start, you'll need:
- A Unity Cloud Build account
- An Apple Developer account with App Store Connect access
- Your app already created on App Store Connect
Overview
The process is as follows:
- Create an API key to allow automated uploads
- Configure Unity Cloud Build
- Configure the post-build script to handle the upload
- Putting it all together
1. Setting up App Store Connect API Key
First, let's create an API key to allow automated uploads:
- Log in to App Store Connect
- In top right corner, click on your name > Edit porfile > Personal API Keys
- Create a new key if you don't have one
- Note down:
- The Issuer ID (or developer identifier, visible at the top of the Keys page)
- The Key ID (generated with your key)
- Download the .p8 file
Keep these values safe as you'll need them for the configuration.
2. Preparing JSON API Key
To upload to App Store Connect, we will be using the fastlane API Key JSON file (documentation at https://docs.fastlane.tools/app-store-connect-api/ in case you need it).
We will create that json and configure it as Environment Variable in Unity Cloud Build.
The JSON should look like this:
{
  "key_id": "D383SF739",
  "issuer_id": "6053b7fe-68a8-4acb-89be-165aa6465141",
  "key": "-----BEGIN PRIVATE KEY-----\nMIGTAgEAMBMGByqGSM49AgEGCCqGSM49AwEHBHknlhdlYdLu\n-----END PRIVATE KEY-----",
  "duration": 1200,
  "in_house": false
}
where key_id is the Key ID, issuer_id is the Issuer ID and key is the content of the .p8 file with linebreaks replaced by \n.
3. Setting up Unity Cloud Build
Configure your build target in Unity Cloud:
- In DevOps > Build automation > Configurations > Create a new iOS target ("+ target setup")
- Fill the configuration to match your project needsIe:
- Target name: Default iOS
- Branch: main
- Project subfolder path: Empty
- Versioning: Always Use Latest 6000.x
- Auto detect Unity version: On
- Build with closest version: On
- Builder Operating System and Version: macOS Ventura - Silicon
- Unity Editor architecture: Apple-Silicon
- In Credentials
- Configure the bundle identifier from your app. It can be found in the App Store Connect > App Information > General > Bundle ID.
- Create a new Credential set
- Name: Any name that match your project credentials
- Provisioning profile:
- You first need a Certificate, if you don't have yet create one at https://developer.apple.com/account/resources/certificates/list with open "iOS Distribution"
- Then create Profile from https://developer.apple.com/account/resources/profiles/list with Distribution > Ad Hoc
- Download the profile (.mobileprovision) and select it in the Unity Credential form.
- p12 file might be a bit tricky to get and couldn't find a way to get it without macOS. Be brave and follow instructions from https://docs.unity.com/ugs/en-us/manual/devops/manual/build-automation/sign-build-artifacts/sign-an-ios-application.
- Precision: you do need the "Certificate Signing Request" step from Keychain Access to have a private key associated with your certificate. Without this step the "export p12" from the certificate will not work.
- In Advanced Options > Script hooks, Add:
- Post-build script: upload-to-appstore.sh
- Pre-Export method: AutoVersionInBuildAutomation.PreExport We will create those scripts later.
- In Advanced Options > Environment Variables, add these variables:
FASTLANE_JSON_API_KEY: copy-paste the json of previous step
4. Version Management
Create a BuildVersion ScriptableObject to manage your versions:
[Serializable]
public class BuildVersion : ScriptableObject {
    public int Major;
    public int Minor;
    public int Patch;
    public string CommitHash = "";
    public int BuildNumber;

    public string ToMajorDotMinorDotPatch() {
        return $"{Major}.{Minor}.{Patch}";
    }

    public static BuildVersion UpdateFromGit(BuildVersion buildVersion) {
        var version = Git.Run(@"describe --tags --long --match ""v[0-9]*""");
        version = version.Replace("-", ".");
        version = version.Substring(1);

        var strings = version.Split('.');
        buildVersion.Major = int.Parse(strings[0]);
        buildVersion.Minor = int.Parse(strings[1]);
        buildVersion.Patch = int.Parse(strings[2]);
        buildVersion.CommitHash = Regex.Replace(strings[3].Substring(1), @"\t|\n|\r", "");
        buildVersion.BuildNumber = Git.GetTotalCommitCount();

        return buildVersion;
    }
}
Create an editor script to update the version:
public class EditorScripts : MonoBehaviour {
    [MenuItem("MyGame/Tools/Update BuildVersion Asset")]
    public static void UpdateBuildVersionAsset() {
        var buildConfig = GetOrCreateBuildVersion();
        BuildVersion.UpdateFromGit(buildConfig);
        EditorUtility.SetDirty(buildConfig);
        AssetDatabase.SaveAssets();
        AssetDatabase.Refresh();
    }
}
4. Post-Build Upload Script
Create a post-build script to handle the upload:
echo "Publishing to Apple Connect"

# Unity environment variables replace the "\n" signs from the private key with spaces for some reason,
# so we replaces spaces with "\n" signs again so it works properly.
KEY_WITH_NEWLINES=$(echo "$FASTLANE_JSON_API_KEY" | jq '.key |= sub(" (?!PRIVATE|KEY)"; "\n"; "g")' -c -j)

echo "$KEY_WITH_NEWLINES" > api_key.json

# The force option skips a manual approval check you'd otherwise need to do
fastlane deliver --ipa "$UNITY_PLAYER_PATH" --api_key_path api_key.json --force
Credits: This script was found on Unity forum: https://discussions.unity.com/t/path-to-the-final-ipa-file/760328/110. Thanks a lot Squeazer!
5. Putting It All Together
- Create your BuildVersion asset in Resources folder using the new "MyGame/Tools/Update BuildVersion Asset" menu item
- Setup a git tag with format v1.0 for your first version.
- Beware: patch number must not be specified (only "v" dot major dot minor). Patch number is the number of commit from last commit to last tagged commit.
- You don't have to tag every commit you want to release, just the ones that worth a minor or major bump.
- Configure Unity Cloud Build with the environment variables-
- Add the post-build script to your repository-
- Configure the post-build script in Unity Cloud Build-
- Now when you push changes:
- Unity Cloud Build will create the iOS build-
- The versions will be extracted from ProjectSettings-
- The build will be automatically uploaded to App Store Connect
Find me on social networks
If you found this article helpful, check my other articles and don't forget to follow me on your favorite network for more game development tips and discussions.