Testing is a crucial part of game development, yet it's often overlooked in Unity projects. In this guide, I'll show you how to implement mocking in your Unity tests, using PlayerPrefs as a practical example. With modern tools like generative AI (I'm often using Claude 3.5 Sonnet), setting up tests has never been easier!
Why Mocking Matters in Unity Tests
There are two main advantages to implementing proper testing with mocks:
- Speed: Tests run much faster than manual testing in the Unity Editor
- Isolation: Mocking allows you to test specific components without depending on runtime-only features (like PlayerPrefs)
All other advantages of testing still apply of course: safety when refactoring, documentation, decoupling by design, etc.
Setting Up Mocking in Unity
Before we dive in, make sure your project meets these prerequisites:
- Test Project properly set up using Unity default creation options
- Projects configured with Assembly Definition Files
Now, let's add Moq support to your Unity project.
1. Configure the Assembly Definition
First, modify your Test project's assembly definition file (.asmdef) to allow external DLLs and link the library and its dependencies:
{
    /* … */
    "overrideReferences": true,
    "precompiledReferences": [
        "System.Diagnostics.EventLog.dll",
        "Castle.Core.dll",
        "Moq.dll"
    ]
}
2. Import Required DLLs
You have two options to get the necessary DLLs:
Option A: Using Rider's NuGet Package Manager
- Install
Moq4.18.4 via NuGet - Locate and copy these DLLs:
%userprofile%/.nuget/packages/moq/4.18.4/lib/netstandard2.1/Moq.dll%userprofile%/.nuget/packages/castle.core/5.1.1/lib/netstandard2.1/Castle.Core.dll%userprofile%/.nuget/packages/system.diagnostics.eventlog/6.0.0/lib/netstandard2.0/System.Diagnostics.EventLog.dll
Option B: Direct Download from NuGet
Download from these links:
- lib/netstandard2.1/Moq.dll (4.18.4)
- lib/netstandard2.1/Castle.Core.dll (5.1.1)
- lib/netstandard2.0/System.Diagnostics.EventLog.dll (6.0.0)
3. Configure DLL Settings

For all three DLLs: Uncheck "Any Platform" and select only "Editor" platform in the Inspector
Practical Example: Testing PlayerPrefs
Let's walk through a complete example of testing a class that manages level scores saving and loading using PlayerPrefs.
1. Create the Interface
First, we abstract PlayerPrefs functionality:
public interface IPlayerPrefs {
    void SetString(string key, string value);
    void SetInt(string key, int value);
    string GetString(string key);
    int GetInt(string key);
    bool HasKey(string key);
    void Save();
}
2. Implement the Wrapper
Create a wrapper for the actual PlayerPrefs:
using UnityEngine;

public class PlayerPrefsWrapper : IPlayerPrefs {
    public void SetString(string key, string value) => PlayerPrefs.SetString(key, value);
    public void SetInt(string key, int value) => PlayerPrefs.SetInt(key, value);
    public string GetString(string key) => PlayerPrefs.GetString(key);
    public int GetInt(string key) => PlayerPrefs.GetInt(key);
    public bool HasKey(string key) => PlayerPrefs.HasKey(key);
    public void Save() => PlayerPrefs.Save();
}
3. The Class to Test
Here's our PersistantState class that manages level scores (and more in the full project):
using System.Collections.Generic;
using System.Linq;
using Newtonsoft.Json;
using TinkState;

public class PersistantState {
    private const string LevelsPersistantStateKey = "LevelsPersistantState";

    // The class uses TinkState to implement observables dictionary
    private readonly ObservableDictionary<string, int> _levelScores = Observable.Dictionary<string, int>();

    // read only from the outside
    public Observable<IReadOnlyDictionary<string, int>> LevelScores => _levelScores.Observe();
    // scoring gives coin in my current project
    public Observable<int> Coins => Observable.Auto(() => _levelScores.Sum(kvp => kvp.Value));

    private readonly IPlayerPrefs _playerPrefs;

    // playerPrefs is abstracted so that I can provide the wrapper in the app, and a mock in tests
    public PersistantState(IPlayerPrefs playerPrefs) {
        _playerPrefs = playerPrefs;
    }

    public void SetLevelScore(string levelId, int score) {
        _levelScores[levelId] = score;
        SaveToDisk();
    }

    // custom serialization logic, that's why I want to test it
    string SerializeHashmap(IDictionary<string, int> dict) {
        var entries = dict.Select(d => $"\"{d.Key}\": {d.Value:0}");
        return "{" + string.Join(",", entries) + "}";
    }

    private void SaveToDisk() {
        // Serialize the Persistant state to JSON
        string levelsJSON = SerializeHashmap(_levelScores);

        // Save the JSON string to _playerPrefs
        _playerPrefs.SetString(LevelsPersistantStateKey, levelsJSON);
        _playerPrefs.Save();
    }

    public void LoadFromDisk() {
        IDictionary<string, int>? inMemoryLevels = null;
        if (_playerPrefs.HasKey(LevelsPersistantStateKey)) {
            string jsonData = _playerPrefs.GetString(LevelsPersistantStateKey);
            // use Newtonsoft.Json to deserialize the JSON string to a dictionary, could be custom logic for better performance
            inMemoryLevels = JsonConvert.DeserializeObject<Dictionary<string, int>>(jsonData);
        }

        // If no saved state exists, init default values
        if (inMemoryLevels == null) inMemoryLevels = new Dictionary<string, int>();

        // load Observable objects from deserialized data
        _levelScores.Clear();
        foreach (var score in inMemoryLevels) {
            _levelScores.Add(score.Key, score.Value);
        }
    }
}
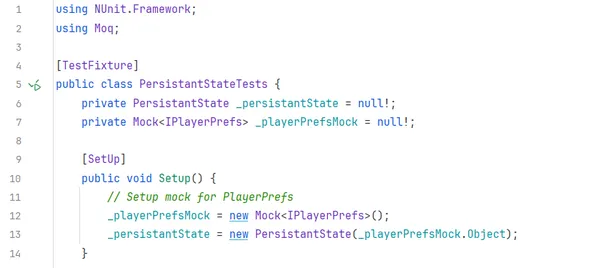
4. Write the Tests
Now we can write comprehensive tests:
using NUnit.Framework;
using Moq;

[TestFixture]
public class PersistantStateTests {
    private PersistantState _persistantState = null!;
    private Mock<IPlayerPrefs> _playerPrefsMock = null!;

    [SetUp]
    public void Setup() {
        _playerPrefsMock = new Mock<IPlayerPrefs>();
        _persistantState = new PersistantState(_playerPrefsMock.Object);
    }

    [Test]
    public void SetLevelScore_SavesToDisk() {
        // Arrange
        string levelId = "level1";
        int score = 100;

        // Act
        _persistantState.SetLevelScore(levelId, score);

        // Assert - verify PlayerPrefs was called with correct data
        _playerPrefsMock.Verify(x => x.SetString("LevelsPersistantState", "{\"level1\": 100}"));
        _playerPrefsMock.Verify(x => x.Save());
    }

    [Test]
    public void LoadFromDisk_LoadsCorrectData() {
        // Arrange
        string savedLevels = "{\"level1\": 100, \"level2\": 200}";

        _playerPrefsMock.Setup(x => x.HasKey("LevelsPersistantState")).Returns(true);
        _playerPrefsMock.Setup(x => x.GetString("LevelsPersistantState")).Returns(savedLevels);

        // Act
        _persistantState.LoadFromDisk();

        // Assert
        Assert.AreEqual(100, _persistantState.LevelScores.Value["level1"]);
        Assert.AreEqual(200, _persistantState.LevelScores.Value["level2"]);
    }

    [Test]
    public void Coins_CalculatesCorrectSum() {
        // Act
        _persistantState.SetLevelScore("level1", 100);
        _persistantState.SetLevelScore("level2", 200);

        // Assert
        Assert.AreEqual(300, _persistantState.Coins.Value);
    }
}
Conclusion
While setting up mocking in Unity requires some initial configuration, the benefits are worth the effort:
- Faster development cycles
- More reliable code
- Easier maintenance
- decoupling (by design)
With modern tools and proper setup, maintaining a comprehensive test suite in Unity has never been more accessible. The initial investment in setting up mocking capabilities pays off quickly through improved code quality and development speed.
Find me on social networks
If you found this article helpful, check my other articles and don't forget to follow me on your favorite network for more game development tips and discussions.
